 |  |  |
 examples of chips | 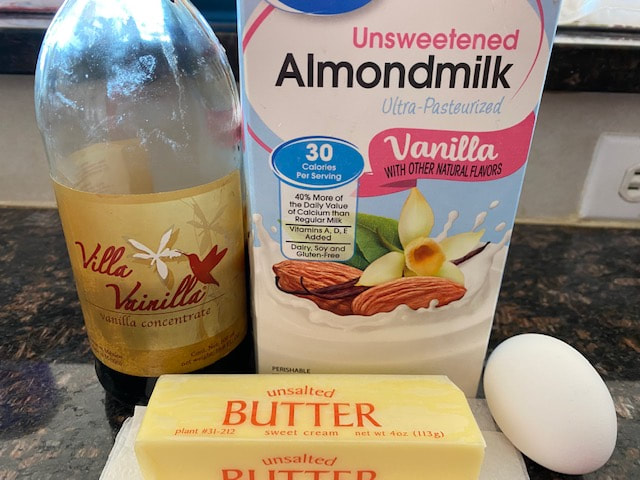 my ingredients | 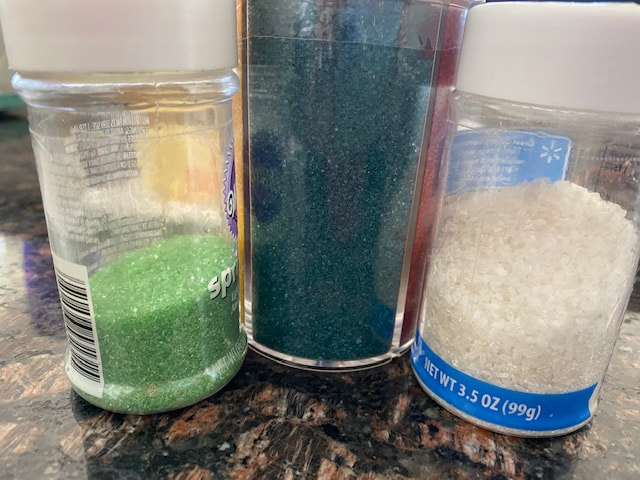 Sparkling / sanding sugars |  foil on bottom of pan | 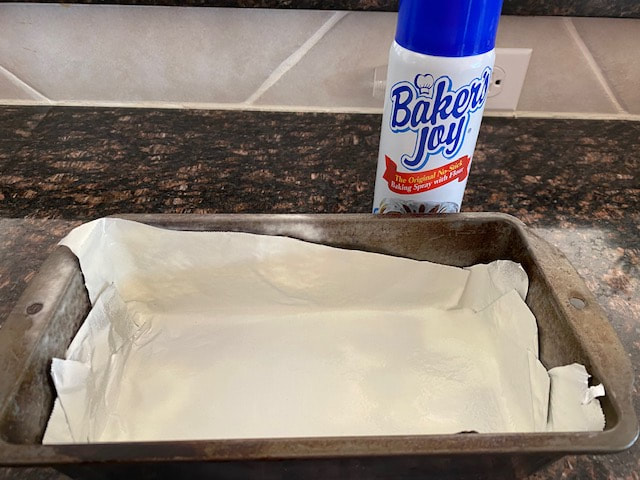 foil in pan ~ sprayed |
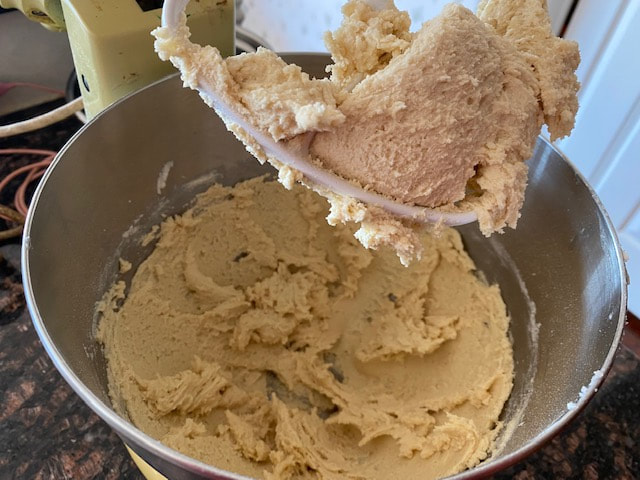 dough ~ perfect texture | 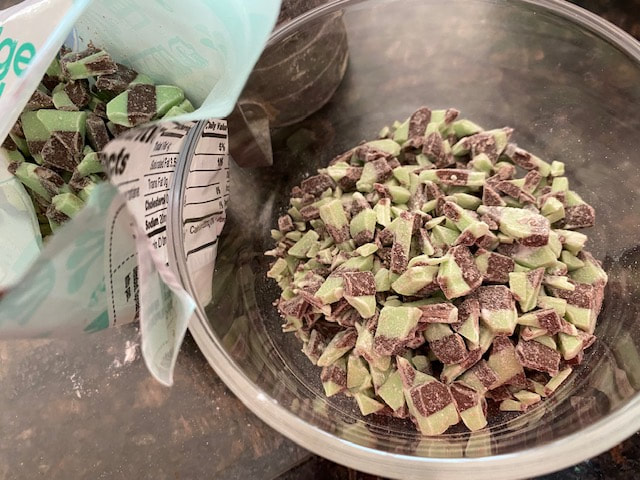 my mint fudge chunks |  3 doughs | 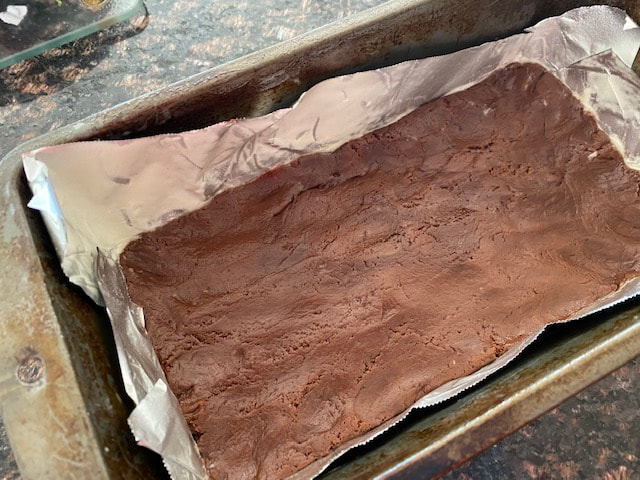 dark chocolate bottom | 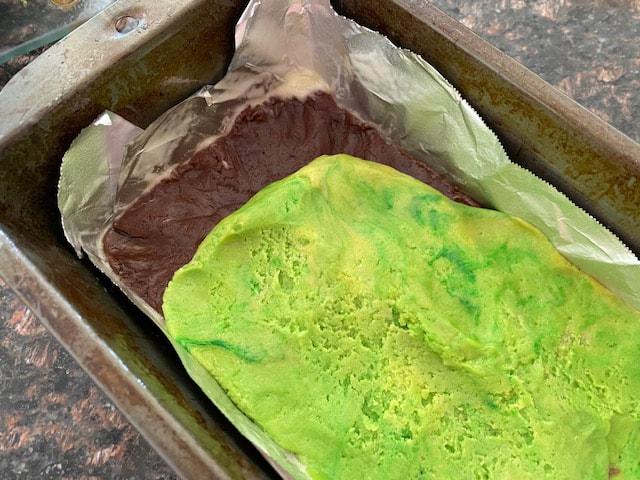 green middle layer | 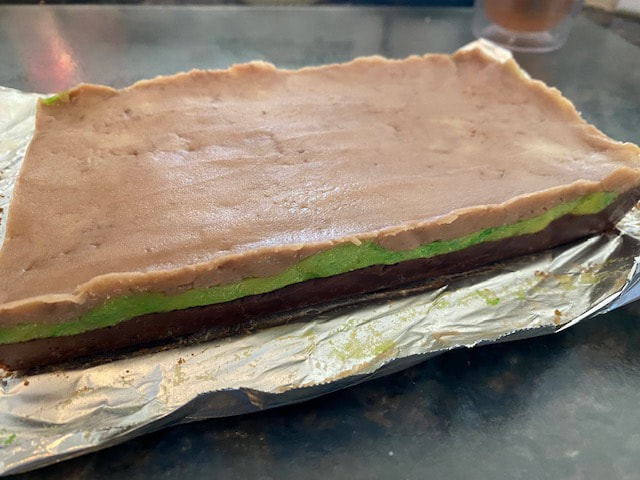 uneven top after chilling |
 roll top smooth | 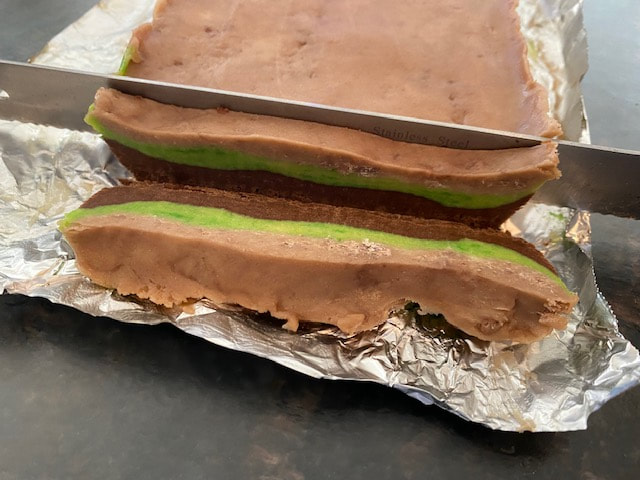 cut slices | 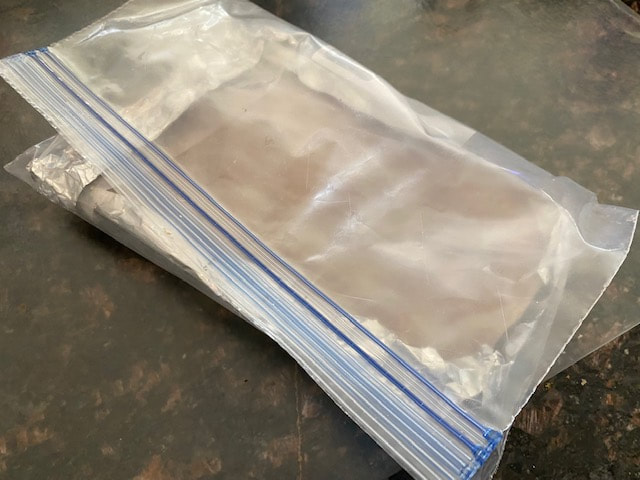 re-wrap dough block | 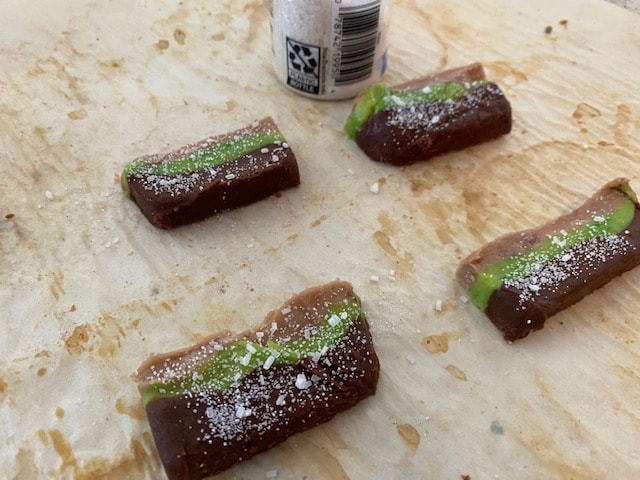 sugar before baking | 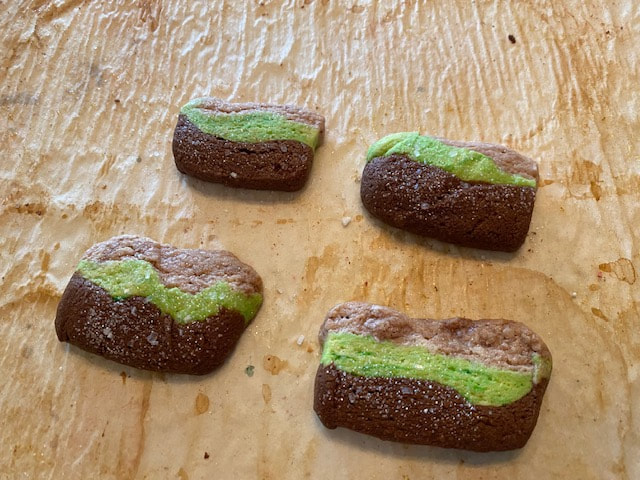 after baking | 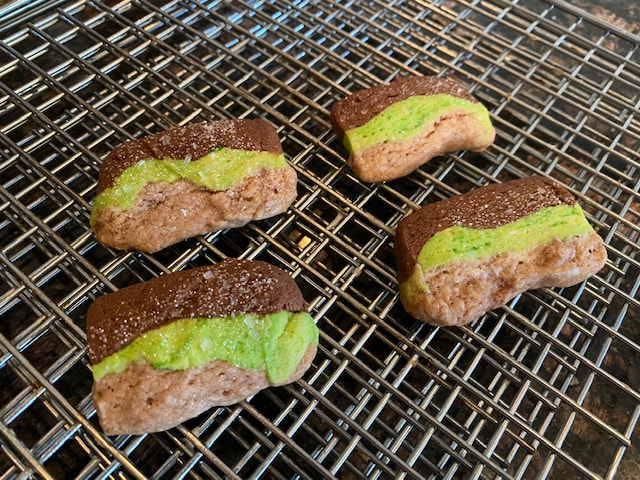 cool on rack |
I love icebox cookies! As you may know, I sell baked goods on eBay and one of my listings is for a Seasonal Assortment ~ so with homemade slice & bake logs, I can have a variety of cookies on hand to bake fresh as I need them! ** and, because I'm a grandma (and great-grandma), you also have some of my "grandma tips" below too!
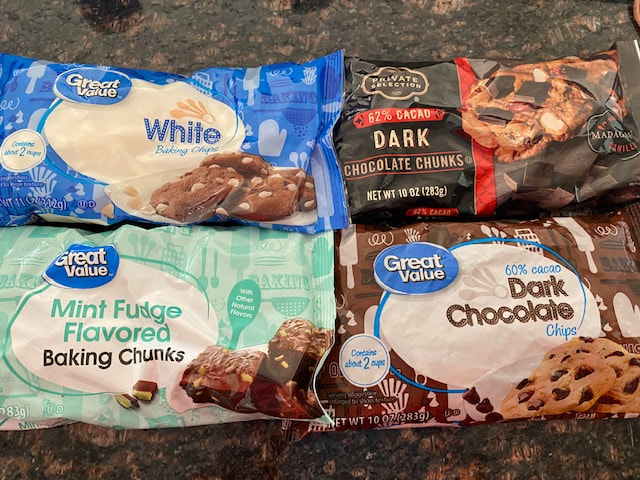
I used MINT chunks (from Walmart) for the milk chocolate/mint layer ~ WHITE CHOCOLATE chips for the green layer (with some food coloring) ~ DARK CHOCOLATE chips for the darker brown layer. Most mint chips will have chocolate either in the same chip, or in the same bag as the green ones (Winter mix has green & chocolate chips). It's up to you what you use.
Just wrap the brick of layered cookie dough well in foil, & stick it into a large zip-top baggie. I keep mine in the refrigerator to use as I need it. You can keep it in the freezer, and it will keep for months there but you need to let it thaw out a little before you can slice & bake it.
MINT & CHOCOLATE LAYERED Icebox COOKIES
1/2 cup (8 TB) butter, softened ……....….. 2/3 cup sugar
1 tsp. baking powder…………………...…. 1/2 tsp. salt
1 egg…………………………………………1 tsp. vanilla
1 TB milk (any kind ~ I like unsweetened vanilla almond or cashew milk)\
2 cups all-purpose flour
1/3 to 1/2 cup mint fudge or chocolate-mint baking pieces, melted and slightly cooled (i.e. Andes mints, green & chocolate mint chips)
1/3 to 1/2 cup white chocolate, melted (chips, wafers, bark)
1/3 to 1/2 cup dark chocolate chips, melted
TIP: I put the chips/chocolate into a little glass bowl in the microwave for 45 seconds, then stir with a spoon until they're melted & smooth.
OPTIONAL: green or clear Splarkling Sugar (decoration)
**
Beat butter in electric mixer bowl (medium-high) about 30 seconds. Add sugar, baking powder, and salt ~ beat until combined (scraping sides of bowl & paddle). Then beat in egg, milk, and vanilla until combined. ** Gradually beat in the flour. Just keep mixing {stopping to scrape down sides} until it all somewhat comes together around the paddle.) Divide dough into 3 parts.
Mix the melted mint & fudge chips into 1 part of the dough; knead with your hands to get it smooth & set aside. ** Then mix the white chocolate & green food coloring into another part of the dough; knead with yur hands to get it smooth & set aside ** Finally, mix the melted dark chocolate chips into the remaining dough; knead with your hands to get it smooth & set aside.
Line an 8” loaf pan with foil & spray with non-stick baking spray (contains flour, and won't be oily like the other sprays). (TIP: Turn your pan upside-down and mold the foil around the bottom of the pan. Now turn the pan over and just put the foil inside. Press against the sides ~ but easier than trying to fit a flat piece of foil in there.)
Press one of the chocolate doughs evenly on the bottom of the pan. Then press the green dough evenly over the 1st layer. Last, press the remaining chocolate dough evenly over the top and smooth. (TIP: If you dampen your fingers, the dough will smooth out much easier.) Chill for at least 2 hours or until firm. (You can then take the layered dough out of the pan ~ wrap well with foil & plastic wrap ~ put into a large ziplock baggie ~ store in either the refrigerator or freezer until you want to use.)
TIP: when you unwrap the dough brick after chilling, the top may be uneven. If so, put a piece of waxed paper on top, and use your rolling pin to smooth out (even up) the top. Then I used a ruler flat against the sides to square them up too. (photos above).
WHEN READY TO BAKE:
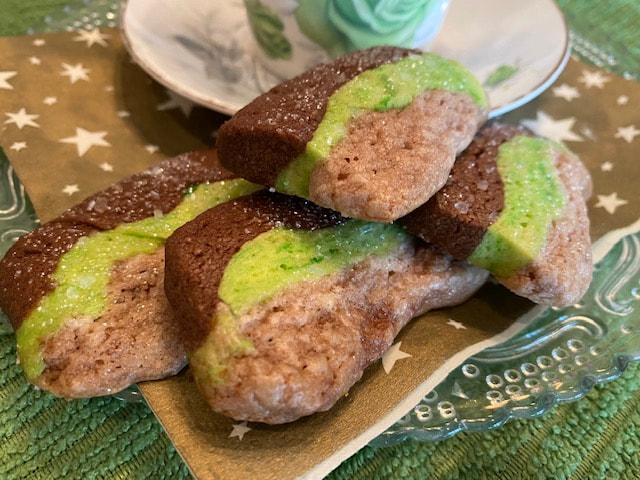
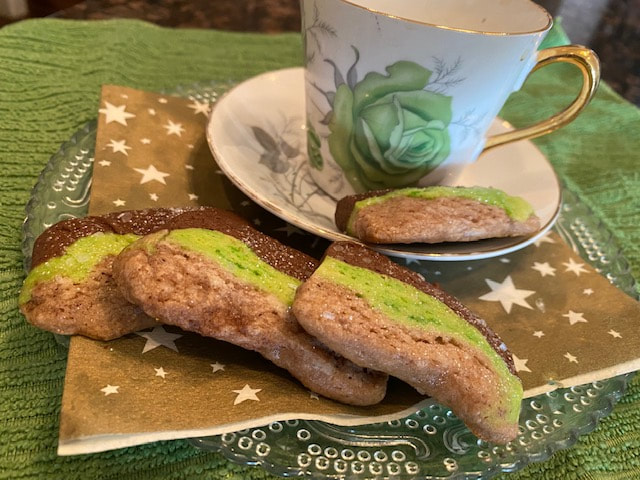
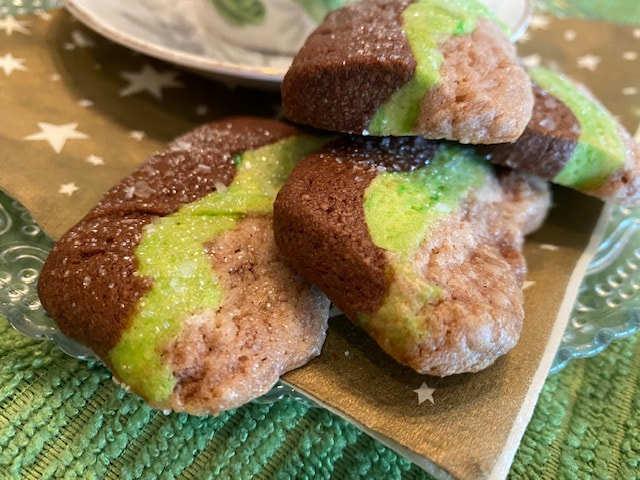
Preheat oven to 350. Line baking sheets with parchment paper. Remove dough brick from wrapping and put on a flat surface. Using a sharp, serrated knife, cut into about 1/4” to 1/2" slices ~ then cut each slice in half across. Put the slices on prepared baking sheet. I like to sprinkle either green or clear Sparkling Sugar over each slice before baking.
Bake about 8-10 minutes, or until edges begin to set. Cool a few minutes in the pan, before removing to rack or paper to cool completely.
Entire recipe makes about 6 dozen cookies. Baked cookies can also be frozen for up to 3-4 months, between layers of waxed paper in sealed container.
I used MINT chunks (from Walmart) for the milk chocolate/mint layer ~ WHITE CHOCOLATE chips for the green layer (with some food coloring) ~ DARK CHOCOLATE chips for the darker brown layer. Most mint chips will have chocolate either in the same chip, or in the same bag as the green ones (Winter mix has green & chocolate chips). It's up to you what you use.
Just wrap the brick of layered cookie dough well in foil, & stick it into a large zip-top baggie. I keep mine in the refrigerator to use as I need it. You can keep it in the freezer, and it will keep for months there but you need to let it thaw out a little before you can slice & bake it.
MINT & CHOCOLATE LAYERED Icebox COOKIES
1/2 cup (8 TB) butter, softened ……....….. 2/3 cup sugar
1 tsp. baking powder…………………...…. 1/2 tsp. salt
1 egg…………………………………………1 tsp. vanilla
1 TB milk (any kind ~ I like unsweetened vanilla almond or cashew milk)\
2 cups all-purpose flour
1/3 to 1/2 cup mint fudge or chocolate-mint baking pieces, melted and slightly cooled (i.e. Andes mints, green & chocolate mint chips)
1/3 to 1/2 cup white chocolate, melted (chips, wafers, bark)
1/3 to 1/2 cup dark chocolate chips, melted
TIP: I put the chips/chocolate into a little glass bowl in the microwave for 45 seconds, then stir with a spoon until they're melted & smooth.
OPTIONAL: green or clear Splarkling Sugar (decoration)
**
Beat butter in electric mixer bowl (medium-high) about 30 seconds. Add sugar, baking powder, and salt ~ beat until combined (scraping sides of bowl & paddle). Then beat in egg, milk, and vanilla until combined. ** Gradually beat in the flour. Just keep mixing {stopping to scrape down sides} until it all somewhat comes together around the paddle.) Divide dough into 3 parts.
Mix the melted mint & fudge chips into 1 part of the dough; knead with your hands to get it smooth & set aside. ** Then mix the white chocolate & green food coloring into another part of the dough; knead with yur hands to get it smooth & set aside ** Finally, mix the melted dark chocolate chips into the remaining dough; knead with your hands to get it smooth & set aside.
Line an 8” loaf pan with foil & spray with non-stick baking spray (contains flour, and won't be oily like the other sprays). (TIP: Turn your pan upside-down and mold the foil around the bottom of the pan. Now turn the pan over and just put the foil inside. Press against the sides ~ but easier than trying to fit a flat piece of foil in there.)
Press one of the chocolate doughs evenly on the bottom of the pan. Then press the green dough evenly over the 1st layer. Last, press the remaining chocolate dough evenly over the top and smooth. (TIP: If you dampen your fingers, the dough will smooth out much easier.) Chill for at least 2 hours or until firm. (You can then take the layered dough out of the pan ~ wrap well with foil & plastic wrap ~ put into a large ziplock baggie ~ store in either the refrigerator or freezer until you want to use.)
TIP: when you unwrap the dough brick after chilling, the top may be uneven. If so, put a piece of waxed paper on top, and use your rolling pin to smooth out (even up) the top. Then I used a ruler flat against the sides to square them up too. (photos above).
WHEN READY TO BAKE:
Preheat oven to 350. Line baking sheets with parchment paper. Remove dough brick from wrapping and put on a flat surface. Using a sharp, serrated knife, cut into about 1/4” to 1/2" slices ~ then cut each slice in half across. Put the slices on prepared baking sheet. I like to sprinkle either green or clear Sparkling Sugar over each slice before baking.
Bake about 8-10 minutes, or until edges begin to set. Cool a few minutes in the pan, before removing to rack or paper to cool completely.
Entire recipe makes about 6 dozen cookies. Baked cookies can also be frozen for up to 3-4 months, between layers of waxed paper in sealed container.
 RSS Feed